
Sending an email is one of the most important additions to any system; be it Transactional emails or sending newsletter emails. In recent surveys, 64% of small businesses use emails to reach customers. This makes it necessary to send emails to customers in order to engage your customers and also build a loyal customer base.
Laravel provides a clean and easy way to send emails without any hassle and difficulties using the Mailable Class.
In this article, I am going to show you how to easily send emails in Laravel and how to create email templates using markdown
What you need to know about Laravel Mail
If you want to send emails from your Laravel application, you need to know about the Laravel Mail API. This simple API is built on top of the popular Swiftmailer library. You can configure it to use SMTP, Mailgun, Postmark, Amazon SES, or Sendmail. You can also use the simple API to send emails directly from your PHP code. Laravel provides multiple mail drivers for sending emails making it easy to send emails using any integration of your liking.
The Laravel Mail API makes it easy to send beautiful email templates. You can create a Mailable class.
It’s easy to get started with Laravel Mail. Just configure your SMTP settings, and you’re ready to go!
How do you send Emails in Laravel?
To send an email message in Laravel, you can follow the following steps
Step 1: Install Laravel
You can create a new Laravel project using the laravel new command
laravel new testStep 2: Create a Mailable Class
You can use the make:mail artisan command in Laravel. This will scaffold a Mailable class where your mail logic will be added.
You can specify the email subject, and the content of the email such as images, attachments, and reply to address among others.
php artisan make:mail OrderMailThis command will create a Mailable Class in the app/Mail Folder
<?php

namespace App\Mail;

use Illuminate\Bus\Queueable;
use Illuminate\Contracts\Queue\ShouldQueue;
use Illuminate\Mail\Mailable;
use Illuminate\Mail\Mailables\Content;
use Illuminate\Mail\Mailables\Envelope;
use Illuminate\Queue\SerializesModels;

class OrderMail extends Mailable
{
    use Queueable, SerializesModels;

    /**
     * Create a new message instance.
     */
    public function __construct()
    {
        //
    }

    /**
     * Get the message envelope.
     */
    public function envelope(): Envelope
    {
        return new Envelope(
            subject: 'Order Mail',
        );
    }

    /**
     * Get the message content definition.
     */
    public function content(): Content
    {
        return new Content(
            view: 'view.name',
        );
    }

    /**
     * Get the attachments for the message.
     *
     * @return array<int, \Illuminate\Mail\Mailables\Attachment>
     */
    public function attachments(): array
    {
        return [];
    }
}
Mail Example using Markdown Template
One of the key benefits of Laravel is that it has markdown support. You can create an email template using markdown. This allows you to have a boilerplate view of the email, which you can customize to your liking or use as is.
You can modify the make:mail command and add a flag to specify which markdown will be used by your Mailable Class. The markdown template is a blade file that is placed in the “emails” directory.
php artisan make:mail OrderMail --markdown=emails.ordersThis creates a default markdown blade file in the resources/views/emails folder
<x-mail::message>
# Introduction

The body of your message.

<x-mail::button :url="''">
Button Text
</x-mail::button>

Thanks,<br>
{{ config('app.name') }}
</x-mail::message>
Using a simple scenario of an order mail, you can pass some default data to the markdown through the with parameter in the Mailable Class. You could use the constructor to receive data from other classes.
You can update the logic of the Mailable class
<?php

namespace App\Mail;

use App\Models\Orders;
use App\Models\User;
use Illuminate\Bus\Queueable;
use Illuminate\Contracts\Queue\ShouldQueue;
use Illuminate\Mail\Mailable;
use Illuminate\Mail\Mailables\Content;
use Illuminate\Mail\Mailables\Envelope;
use Illuminate\Queue\SerializesModels;
use Illuminate\Support\Facades\URL;

class OrderMail extends Mailable
{
    use Queueable, SerializesModels;

    public $order, $user;

    /**
     * Create a new message instance.
     */
    public function __construct(Orders $order ,User $user)
    {
        $this->order = $order;
        $this->user = $user;
    }

    /**
     * Get the message envelope.
     */
    public function envelope(): Envelope
    {
        return new Envelope(
            subject: 'Your Order is being Processed',
        );
    }

    /**
     * Get the message content definition.
     */
    public function content(): Content
    {
        return new Content(
            markdown: 'emails.orders',
            with:[
                'order' => $this->order,
                'customer' => $this->user,
                'order_url' => URL::route('orders.show', $this->order->id)
            ]
        );
    }

    /**
     * Get the attachments for the message.
     *
     * @return array<int, \Illuminate\Mail\Mailables\Attachment>
     */
    public function attachments(): array
    {
        return [];
    }
}
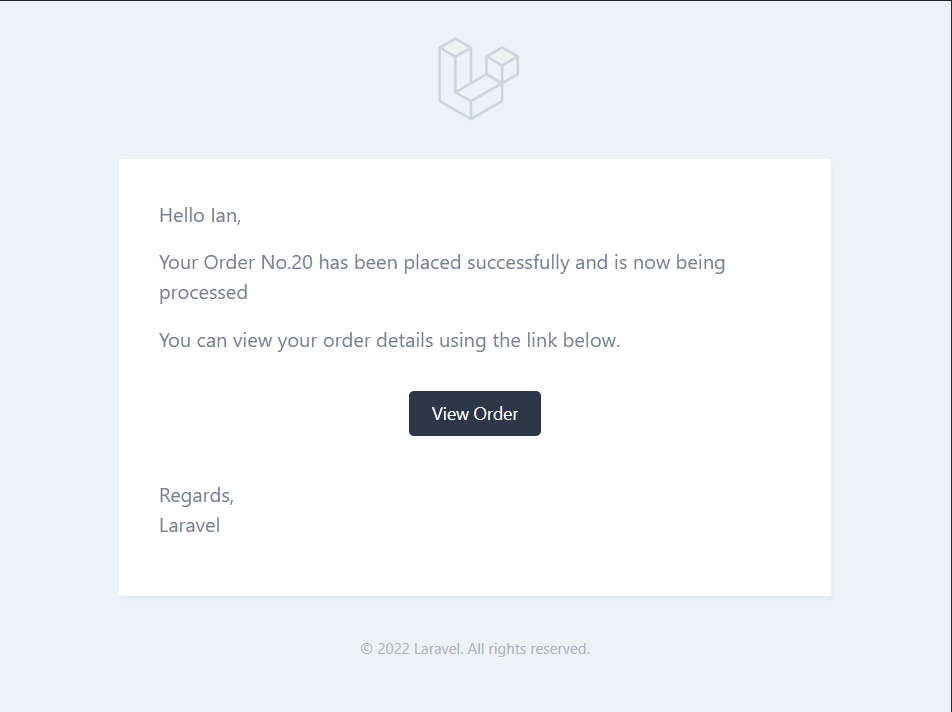
The next step is to add content to the markdown blade template
<x-mail::message>
Hello {{$customer->name}},

Your Order No.{{$order->id}} has been placed successfully and is now being processed

You can view your order details using the link below.

<x-mail::button :url="$order_url">
View Order
</x-mail::button>

Thanks,<br>
{{ config('app.name') }}
</x-mail::message>
If you want to customize the Laravel Mail Components, you can publish the assets and change them to your liking using this command
php artisan vendor:publish --tag=laravel-mailStep 3: Sending email in Laravel
Once you have the email template set, it is now time to send an email. You can use the Mail Facade to send an email. It comes with a lot of methods but the most important is the to() method. This method defines where the email will be sent. You can pass a user’s email as a parameter and Laravel will send the email to the email specified.
The next important method is the send() method. This method allows us to specify a Mailable message Instance. This is where you specify the Mailable class you had created earlier.
use Illuminate\Support\Facades\Mail;
Mail::to(request()->user())->send(new MailableClass);
You can update the Facade to include your Mailable Class
use Illuminate\Support\Facades\Mail;

$user = User::find($id)?? auth()->user();
$order = Orders::find($id);
Mail::to($user->email)->send(new OrderMail($order, $user));
Emails can be queued and sent in the background, making your application even faster.
Before sending an email, you first need to update the mail configurations.
You can set the default details in the env file.
MAIL_MAILER=smtp
MAIL_HOST=mailpit
MAIL_PORT=1025
MAIL_USERNAME=null
MAIL_PASSWORD=null
MAIL_ENCRYPTION=null
MAIL_FROM_ADDRESS="hello@example.com"
MAIL_FROM_NAME="${APP_NAME}"
Once you have set the mail configurations, you can now start sending emails from your Laravel Application.
Step 4: Testing emails in Laravel
Laravel makes it easy to test emails using either the Laravel log file,mailpit, or Mailtrap as third-party integration. These services provide a fake SMTP server from where you can test and verify that your emails are correctly formatted.
All you need to do is change the mail configurations in the env file and use the credentials of any fake SMTP server.
Using Mailtrap, for instance, you can visually see how the email is formatted.
Which third-party email-sending providers are supported in Laravel?
Laravel supports several third-party email-sending providers, including Mailgun, Postmark, Amazon SES, and SendGrid. Each provider has its own strengths and weaknesses, so it’s important to choose the one that best suits your needs.
If you prefer using your own SMTP server, ensure that your server’s SMTP port is not blocked. Most VPS services such as
Other services, such as Contabo and Kamatera, however, do not block port 25, making it easy to host your own mail server.
If you prefer hosting your own mail server as opposed to using third-party email service providers, then you can read this article.
It is good to note that hosting your own mail server comes with its fair share of cons, such as emails may be delivered to the spam folder. This is because your mail server IP is still new among other email SMTP servers, and it will require you to warm up your IP so that it gains a good reputation among other servers.
This is why most people prefer using third-party email service providers so that they can concentrate more on what matters.
Send Emails in Laravel using Gmail’s SMTP Server.
Most people prefer using their default Gmail account as an SMTP server for their Laravel Application because it is free. In this part, I will show you how to use Gmail as an SMTP server for sending your Laravel Emails.
It is good to note that Gmail only gives you 500 emails per day for free accounts and 2000 emails for paid Google Workspace emails so you might consider using it only as a testing tool and not a production service
Configure Google Account
You first need to configure some security settings in your Gmail account. To do so, log in to your Gmail account and select “Manage your Google Account” from your profile.
You then need to activate 2 step verification

Once you have activated 2-step verification, you will have access to the App password section.

Click on the App passwords section and create a new password for your Laravel Mail Application.
Choose the Mail App and the device Custom


Update Mail Configurations
Once you have generated your app password, you can update your mail configurations in the env file to use Gmail’s SMTP configurations.
MAIL_MAILER=smtp
MAIL_HOST=smtp.gmail.com
MAIL_PORT=465
MAIL_USERNAME=youremail@gmail.com
MAIL_PASSWORD=generated password
MAIL_ENCRYPTION=ssl
MAIL_FROM_ADDRESS=youremail@gmail.com
MAIL_FROM_NAME="${APP_NAME}"
Once you have set the configurations, you are set to send emails using Gmail for free. Do bear in mind that Gmail allows only 500 emails per day, so if your application will be sending a lot of emails, you might consider other services.
Conclusion
Sending Emails in Laravel is easy and is essential in any production-ready application. Through emails, you can engage customers and automate some of the tasks that are necessary for a fully functioning application. In this article, we have covered how to set up a Simple Mail Implementation in Laravel and how to configure Gmail’s SMTP server so that we can use it with our Laravel application.
There are multiple ways you can send emails in Laravel. One way is scheduling them using Laravel Scheduler. I hope this article was informative, and I hope you enjoyed reading it. Thank you for reading.