
Introduction
Heroku is a cloud platform as a service that supports multiple programming languages. It supports programming languages such as PHP, Python, Ruby, Node.js, and Go among others. Heroku allows developers to move their applications from development to production effortlessly. In this tutorial, you will learn how to deploy A Laravel App on Heroku. Heroku provides an easy way of deploying, managing and scaling modern applications.
As a developer, there are times we may want to host an application online quickly and at no cost because we either want to test or have our side projects hosted for our resume. In this case, Heroku provides a free platform for hosting these and many other projects completely for free and this removes the burden of buying a hosting service.
How to Deploy A Laravel App on Heroku
To deploy a Laravel app on Heroku, we need the following:
Prerequisites
- Create a Heroku Free Account.
- Download/Install the Heroku CLI.
- Have a Laravel application ready.
- Have a git repo initialized locally.
If you don’t feel like reading the whole article, you can check out this video
If you have all that setup, then let’s get started.
Prepare Heroku CLI
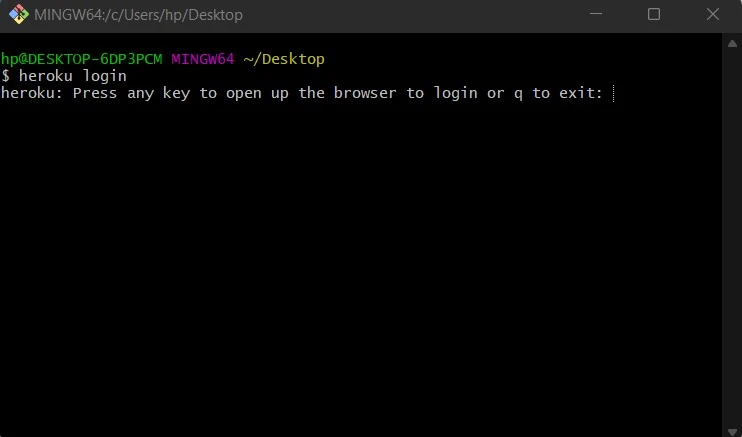
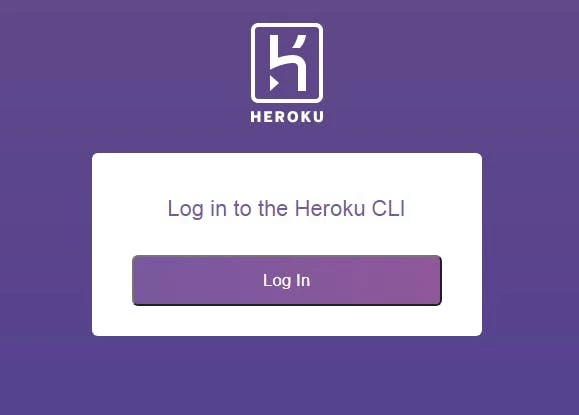
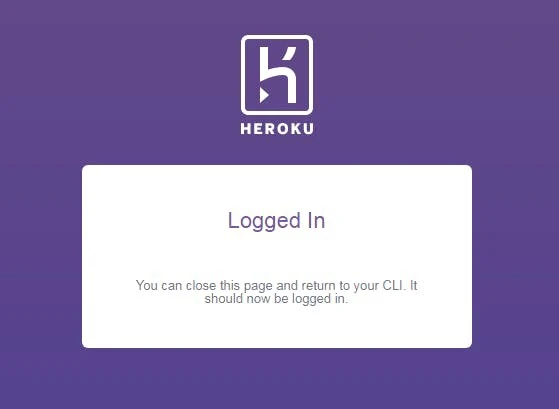
Once we have installed the CLI, we can log in to Heroku through the CLI. To do so, we will use the heroku login command in our terminal. Your browser will open and you will be redirected to a login page where you can enter your credentials. If everything worked then you’re logged in and you can now use the Heroku CLI.
Create a Procfile
Inside the Laravel Root folder, make a file called Procfile.
Write the following line inside the Procfile
web: vendor/bin/heroku-php-apache2 public/Create Heroku Application
We can create a Heroku application in two ways: through the Heroku dashboard or through the Heroku CLI.
To create the application through the Heroku dashboard, log in to your Heroku account and create a new application.

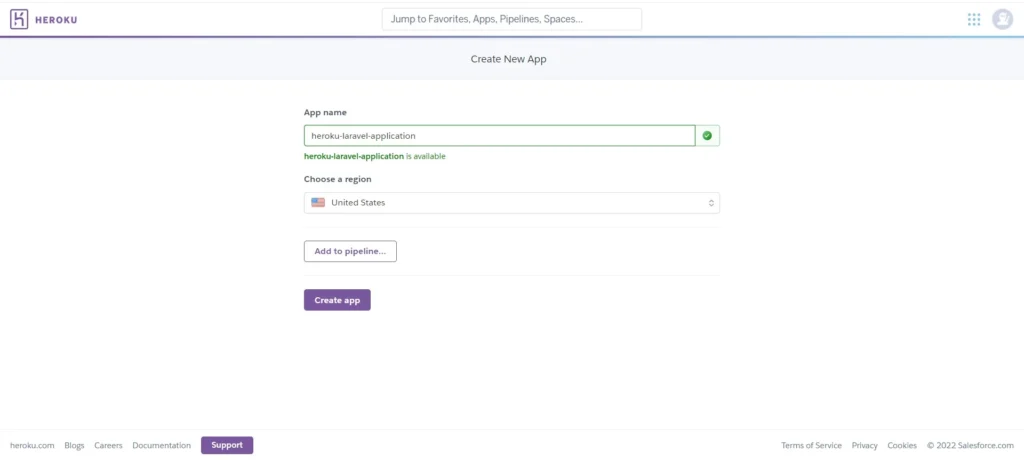
With that, you have a Heroku application created.
To create the application through the Heroku CLI, we will use the heroku create command. When using this command, we have to provide the application name. Otherwise, Heroku is going to generate a random name and URL. We will refine our command to heroku create app-name.
Push Code to Heroku
You can type git remote -v and check if our local Laravel application is connected to the Heroku git repo.
After creating a Heroku application, we can now push our code to Heroku.
To push the code run the command, git push heroku main. Once it’s done, we can now check if our application is visible on the Heroku dashboard.
With that, the application is deployed to Heroku. Click on the “Open App” Button.

Debug the 500 Server Error
After clicking the “Open App”, we are presented with a 500 Server Error page.
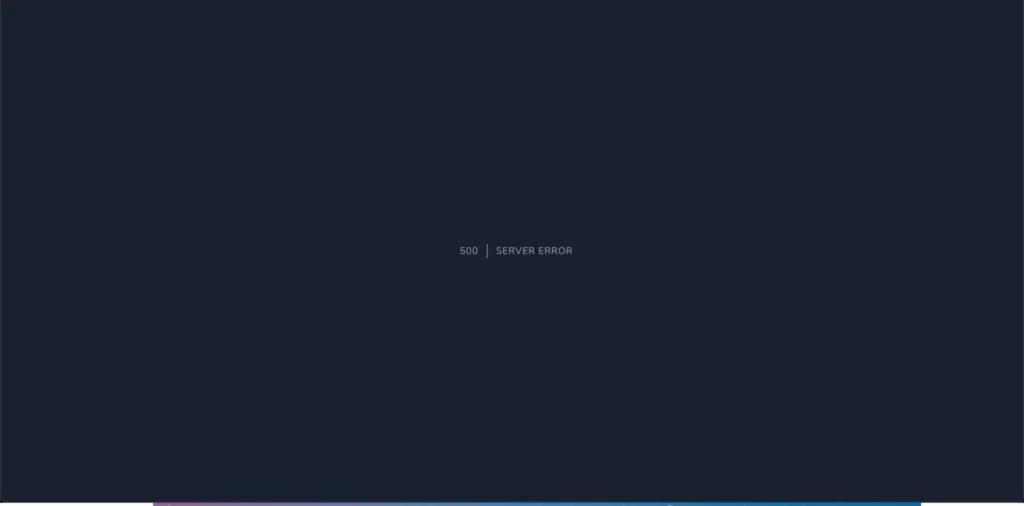
This is both a good thing and a bad thing. It is good in that it shows our application is deployed to Heroku successfully and it is bad because we are not able to interact with the application. To debug this issue, we can check the logs in the Heroku Dashboard to see what is wrong.
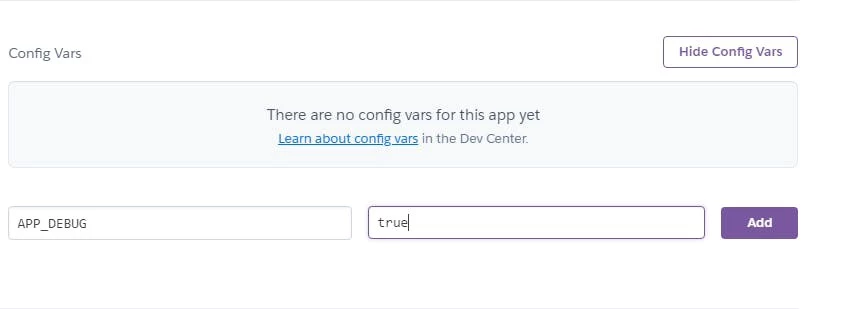
Turns out we haven’t added the environment config variables needed for the application to work. These variables are present in the .env file in our application. To add these credentials, we can access our Heroku dashboard settings and add the APP_DEBUG variable and set it to true. This will enable us to see what the error is. To do so we will head over to the settings tab and set the variable in the config vars.
Once we add the variable and refresh the page, we can clearly see what the error is.
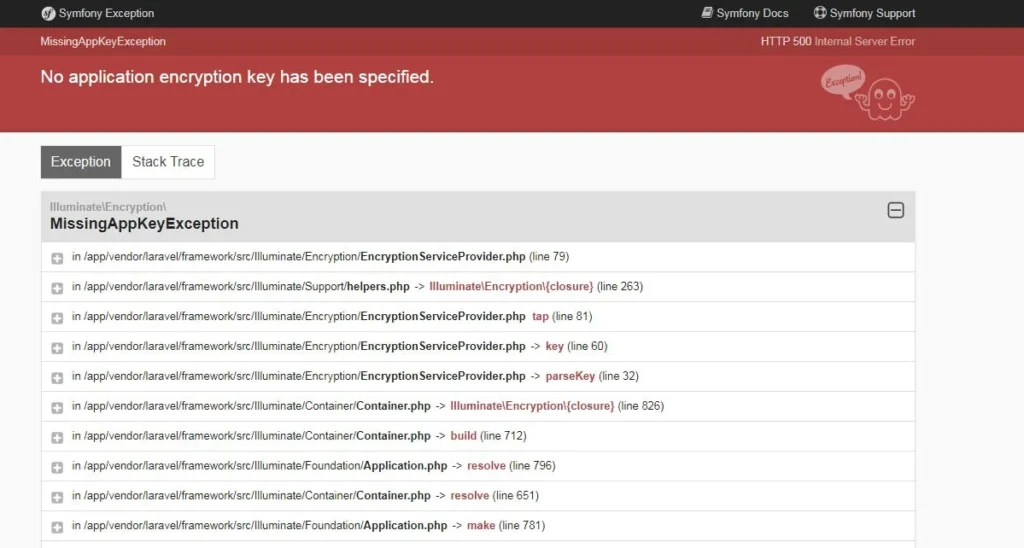
From the error, we can see that we have not added the encryption key which is needed by Laravel. We can add it by copying the encryption key in our local Laravel application and adding it to the environment variables on Heroku.

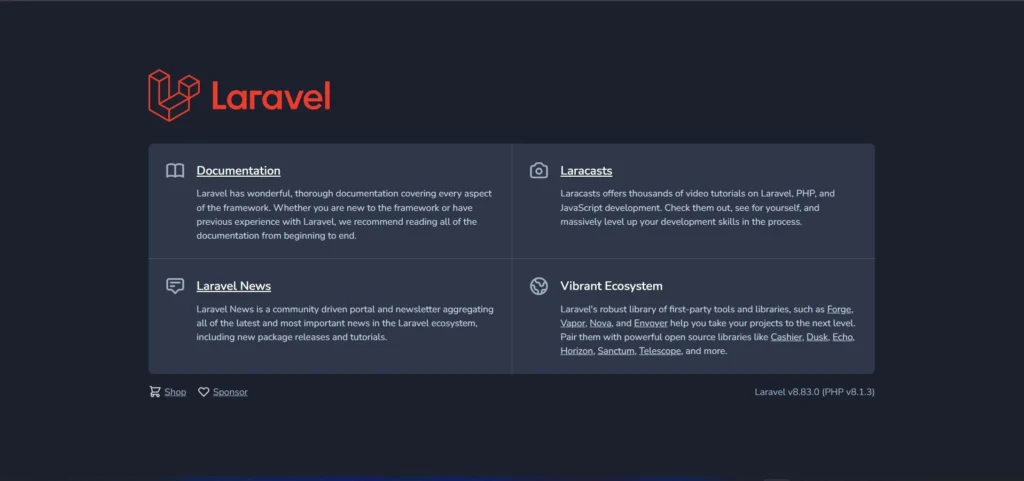
If we now refresh the page, we can see our app is now up and running.
Add .env Credentials to Heroku
We can add the other variables in two ways. The first way is by adding the configurations through the dashboard. Head over to settings and scroll to the Reveal Config Vars option. From there we can add configurations.

The second way of adding environmental variables is through the Heroku CLI. We will use the command heroku config:add key=value. For example, we can add the other Laravel configurations using the command heroku config:add APP_ENV=production, heroku config:add APP_NAME=heroku-laravel and so on.
Once we have added all the configurations, we are good to go.
Create A Database
A common requirement for every application is having a database. We can connect our newly deployed application to a database. Heroku provides multiple databases such as MySQL, MongoDB, PostgreSQL among others. By default, Heroku recommends PostgreSQL and it is easy to add and connect with our application. They also provide a free plan on the database which is also pretty awesome.
To add the database, we will add it as an add-on to our application.
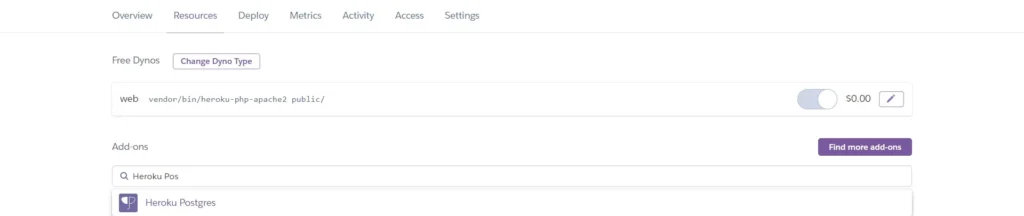
Once we have added the PostgreSQL add-on, we need to connect it to our application. Luckily, we can use the heroku pg:credentials:url command to view the credentials.
We then need to set up the correct DB_CONNECTION to pgsql to instruct Laravel to use the PostgreSQL database driver for our application. We can add all the other database credentials to our application.
Migrate and Seed Database
Once the database connection is done, we can migrate and seed our database. We can use the heroku run command in our local machine to run artisan commands remotely on the heroku platform. To migrate our database, we can use the command heroku run php artisan migrate –seed.
With that, our database is migrated and seeded and is now ready for use.
We can run other artisan commands the same way using the heroku run command. For example, we can run the command heroku run php artisan cache:clear to rebuild our application cache.
Conclusion
That is pretty much it. We have deployed our Laravel app to Heroku in minutes. You have learnt how to move your app from development to production through Heroku. There are other ways of deploying a Laravel application such as deploying a Laravel application on Ubuntu Server with Apache server among others. I hope this article was helpful in helping you deploy your application to Heroku. If you have any questions, feel free to ask them in the comment section below.