You have worked hard to build your Laravel application, and it’s now time to deploy it to the internet so that others can be able to see your application. But how? you may wonder. There are many ways of deploying Laravel, such as deploying Laravel on Shared Hosting(Cpanel) and deploying on the LEMP stack, among others.
In this tutorial, you will learn how to deploy a Laravel application on Apache and set up an SSL certificate using the Free Let’s Encrypt SSL on a Ubuntu server. You will learn how to use the LAMP stack to deploy your application.
LAMP is an acronym that stands for:
- Linux
- Apache
- MySQL
- PHP
These are a set of technology stacks needed to power your Laravel Application.
Linux is the operating system that will host our application. We will use Ubuntu for this case.
Apache is the HTTP server that will be responsible for managing the routing, traffic, and displaying of the pages for our application.
MySQL is the database that will hold the data required for our application.
PHP is the language responsible for interpreting our application.
Prerequisites
Some of the requirements are:
- An Ubuntu server. We can get this from any hosting provider, such as Digital Ocean, Cloudways, Linode, Vultr, among others.
- A valid domain name. This is the domain name that is pointed to our server IP. You can purchase one from Namecheap or Godaddy.
- A Laravel application.
- A git repository.
Once those requirements are met, we can continue with the setup. For me, I will use Digital Ocean as my VPS provider as they have good servers that are definitely worth the money.
You can get started with Digital Ocean with a 60 day free trial today.
Deploy Laravel application with Apache on Ubuntu.
There are a few steps we will need to carry out in order to deploy our application. Let’s get started.
1. Log-In via SSH
If you already have an Ubuntu server in any cloud provider, you can log in to it through SSH.
There are multiple ways to SSH to your server and are dependent on your local operating system.
Windows Install SSH Client
Windows by default does not have an inbuilt SSH client. Because of that, you need to install PUTTY which is an SSH client for Windows.
Linux and Mac
If you are using Linux (on your local machine) or macOS then you will have SSH capabilities by default. You will simply use your Terminal and use the ssh command.
Logging Into Our Server
Once your SSH client is ready, it is now time to log in to our server. You can type the command below in the terminal
ssh root@101.100.100.001 Simply replace 101.100.100.001 with the IP address for your server. This address is displayed on the dashboard by your cloud provider.
If you’re using SSH Keys, you’ll probably get a notice asking if you want to trust or add this IP address to your list of known hosts the first time you log in.
Simply accept it to proceed, and you will not receive this message again.
Once you are on your Digital Ocean server, you will get a welcome message from Ubuntu.
2. Update the Package Installer
We will be using the Apt-Get installer to install new packages onto our server. Before we start installing packages, we need to ensure it is up to date. To do so, we can use the following command:
sudo apt-get updateOnce the update is done, we can go to the next step.
3. Install Apache
Now that our installer is up to date, we can now install our web server Apache on the server. This is the A in the LAMP stack mentioned above. We can run the following command:
sudo apt-get install apache2 -yThis will install the Apache webserver package and start the Apache web service automatically.
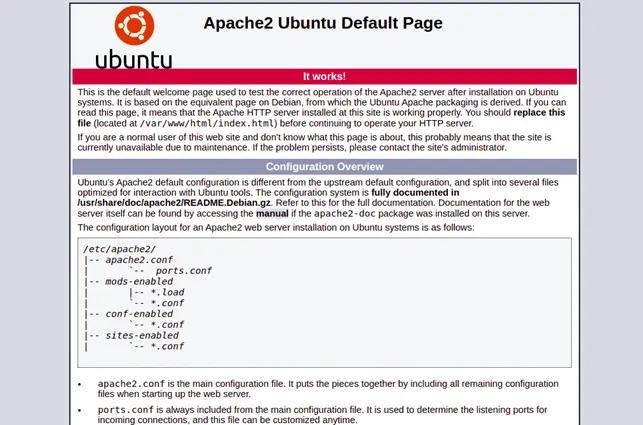
To test the Apache web server, open a new tab on your browser and access the URL http://your-server-ip. For example, in my case, it will be http://101.100.100.001.
You should see the apache default page as shown below, indicating that it works.
4. Install MySQL
The next step is to install our database server on our VPS. This is the M in the LAMP stack mentioned above. You can install any other database such as PostgreSQL, among others.
In our example, we will install the MySQL server. We will use the following command:
sudo apt-get install mysql-serverThis will install MySQL.Allow the installation to complete until a bright pink/purple screen appears. This may be the worst color choice ever for a terminal application, but there’s nothing we can do about it but accept it. For the root MySQL user, you’ll need to enter a password.
Choose something safe and secure, then press the enter key.
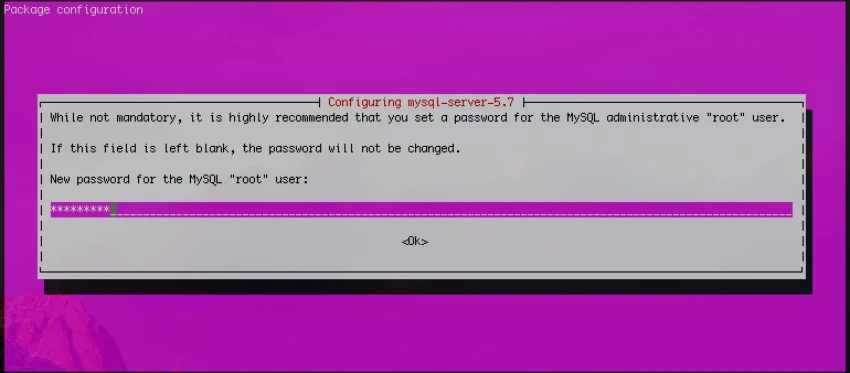
It will ask you to confirm your first password after you have created it. Obviously, they must match. This is also a password that you must remember.
As a result, make sure you keep the password somewhere safe or that you can remember it. You’ll be using this password frequently in the future.
Secure MySQL (Optional)
Once it’s done, we can secure our MySQL database server. We all know that most people use MySQL without a password. For example, on my local computer, my MySQL doesn’t even have a password, and the default and only user is root.
While this is okay during development on a local server, it is not usually the case when our application is in production.
So, how do we secure MySQL on our server? Luckily, MySQL has a helper which helps get rid of most of these bad habits. We can use the following command to begin the process of securing the database.
sudo mysql_secure_installationDepending on your version, it might ask you to install the VALIDATE PASSWORD plugin. I personally don’t think this is necessary since I will have control over making new users, and I will make sure the passwords are secure enough, so I will skip over this setting. (Type ‘N’).
VALIDATE PASSWORD PLUGIN can be used to test passwords
and improve security. It checks the strength of password
and allows the users to set only those passwords which are
secure enough. Would you like to setup VALIDATE PASSWORD plugin?

Press y|Y for Yes, any other key for No:
Next, it will ask you if you want to change the existing password for the root user. If you had set a secure password in the last step, then you can also skip this question by pressing any key (other than ‘Y’).
If you left the password blank or set up a random password (like ‘password’ or ‘1234’), then go ahead and change your password now.
It will then ask you to remove an anonymous user. Type Y to remove the anonymous users; this is a major security risk.
Now it will ask if you want to Disallow root login remotely, and you should also select Y.
Another prompt asks to Remove the test database and access it. This is a good idea to do, so type Y for this.
It may also ask to reload privilege tables now This is always a good idea, so type Y.
With that, you are done.
5. Install PHP
This is the last tech stack in the LAMP stack mentioned at the start of this tutorial. It represents the P in the stack.
We can install all the PHP requirements using the following command:
sudo add-apt-repository -y ppa:ondrej/php
sudo apt-get update
sudo apt-get install libapache2-mod-php php php-common php-xml php-mysql php-gd php-mbstring php-tokenizer php-json php-bcmath php-curl php-zip unzip -y
At the time of this writing, this will install the new version of PHP, version 8.4! With PHP now installed, we have our full LAMP stack installed.
6. Configure PHP
Now that the whole LAMP stack is installed, we can now start configuring everything to get them working. We will start with PHP.
In your terminal, open the php.ini file in any of your preferred text editors(VIM, eMacs, Nano) but for my case, I will use Nano as I find it easier to use.
sudo nano /etc/php/8.4/apache2/php.iniThe line we need to edit is cgi.fix_pathinfo=0 so you can either search for it manually, or you can search for it using Ctrl+W.
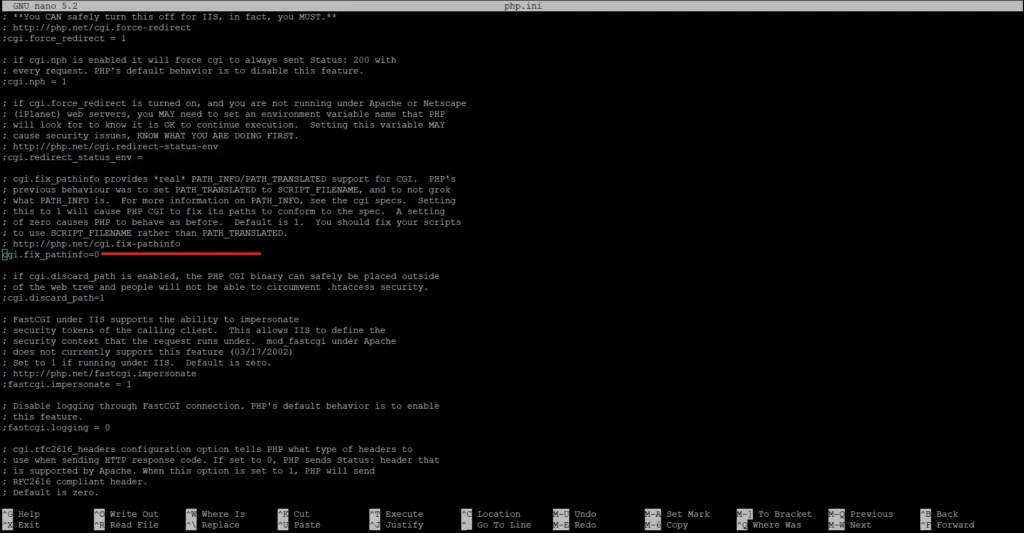
Press Ctrl+W and now type in cgi.fix_pathinfo and click enter. This will take you to the right line. You will see a semicolon on the left of this line. Delete the semicolon and then change the value from 1 to a 0 and save the file.
To save something in Nano, just press Ctrl+X and type Y and then press Enter.
Before the changes can take effect, we need to restart the Apache service by typing in this command:
sudo systemctl restart apache27. Install Composer
Composer is a PHP dependency manager that manages the dependencies and libraries that PHP applications require. We will need it to install the Laravel dependencies and packages.
To install Composer, run the following command:
curl -sS https://getcomposer.org/installer | php You should get the following output:
All settings correct for using Composer
Downloading...

Composer (version 2.8.8) successfully installed to: /root/composer.phar
Use it: php composer.phar
After that, copy the downloaded binary to the system directory.
sudo mv composer.phar /usr/local/bin/composerOnce composer has been moved to the bin folder, we can verify its version by running the command:
composer --versionAt the time of writing, this is the output I received:
Composer version 2.8.8 2025-04-04 16:56:46
PHP version 8.4.6 (/usr/bin/php8.4)
8. Configure Apache
Here is where things will start getting tricky. Let’s configure our web server to host our Laravel application.
We will start first by creating an Apache virtual host configuration file to host our Laravel application.
sudo nano /etc/apache2/sites-available/laravel.confWe can name the file anything. For my case, I named it laravel.conf. We then need to add the following lines:
<VirtualHost *:80>
    ServerAdmin admin@example.com
    ServerName mydomain.com
    DocumentRoot /var/www/html/laravel/public

    <Directory /var/www/html/laravel>
    Options Indexes MultiViews FollowSymLinks
    AllowOverride All
    Require all granted
    </Directory>

    ErrorLog ${APACHE_LOG_DIR}/error.log
    CustomLog ${APACHE_LOG_DIR}/access.log combined
</VirtualHost>
We have a couple of things we added and need explanation. The first line <VirtualHost *:80> instructs Apache to listen through port 80 which is http. The ServerAdmin is the email of the person responsible for maintaining the server.
So we can add our email there. The ServerName sets the request scheme, hostname, and port that the server uses to identify itself. Here, we add our domain name, which is already mapped to the server IP address.
We can also add the server IP address directly if we don’t have a domain name yet. An example would be ServerAdmin 101.100.100.001.
The DocumentRoot tells Apache where our index.php file will be. This is the start script for Laravel. The Directory specifies the location of our Laravel application on the server.
The ErrorLog and CustomLog are directives showing where the logs will be stored in case of errors.
We can now save and close the file and then enable the Apache rewrite module, and activate the Laravel virtual host with the following command:
sudo a2enmod rewrite
sudo a2ensite laravel.conf
Finally, reload the Apache service to apply the changes:
sudo systemctl restart apache29. Install our Laravel Application
Now that we have already configured the majority of the requirements, we can now install/deploy our application on the server.
If you can remember, in step number 8(Configure Apache), we did set up the Directory telling Apache that our application will be stored in the /var/www/html/laravel folder.
Now that Apache knows where to look for our application, we can create the folder and cd into it using the following command.
mkdir /var/www/html/laravel && cd /var/www/html/laravelWe can now install our Laravel application here. We can install the application by cloning it onto our server through Git.
Here, you can set up GitHub Actions to Push your application to the server. You can read this article on how to automate deployment using GitHub Actions.
For now, I will just clone a new Laravel application onto my server
git clone https://github.com/laravel/laravel.gitRun Composer
We can use Composer to install the laravel dependencies.
composer install --no-devWe use the –no-dev flag to install only the dependencies that are required in production.
Laravel Permissions
In order to run, Apache needs certain permissions over the Laravel directory we made. We must first give our web group control of the Laravel directory.
You can read more on Linux file permissions here.
sudo chown -R www-data:www-data /var/www/html/laravel

sudo chmod -R 775 /var/www/html/laravel

sudo chmod -R 775 /var/www/html/laravel/storage

sudo chmod -R 775 /var/www/html/laravel/bootstrap/cache
We can finish the Laravel installation by running the following commands:
cp .env.example .env
php artisan key:generate
Database Setup
We installed MySQL a while ago, but we haven’t yet created a database to store our application data in it. We can set up the database that our application will be using in production.
Let’s start by executing the following command into MySQL:
mysql -u root -p 'your password'Replace the “your password” with the password you had set up before installation. Once we are logged in, we can now create a database using the following command:
CREATE DATABASE yourdatabase;The next step is to grant all privileges to the user.
GRANT ALL PRIVILEGES ON database_name.* TO 'username'@'localhost';Finally, you can update the user privileges.
FLUSH PRIVILEGES;Once the database has been created, we can now exit MySQL using the command exit.
Configuring Laravel
We can start by adding the database credentials to the .env file we generated earlier. This file contains all the application variables that need to be kept secret.
sudo nano .envWe can also set the APP_ENV Key to production since our application is in production and also turn the APP_DEBUG key to false.
This ensures that debug and stack trace messages are not displayed to the general public.
APP_ENV=production
APP_DEBUG=false
APP_KEY=base64:kGKg6DnMqMGBJrLGDh4Jg+bTIXqcVXZKqJdqueTlkCk=
APP_URL=http://mydomain.com

DB_HOST=localhost
DB_DATABASE=yourdatabasename
DB_USERNAME=root
DB_PASSWORD=yourdatabasepassword

CACHE_DRIVER=file
SESSION_DRIVER=file
QUEUE_DRIVER=sync

REDIS_HOST=localhost
REDIS_PASSWORD=null
REDIS_PORT=6379

MAIL_DRIVER=smtp
MAIL_HOST=googlemail.com
MAIL_PORT=465
MAIL_USERNAME=XXXXXXXXXXX
MAIL_PASSWORD=XXXXXXXXXXX
MAIL_ENCRYPTION=null
There are a few more things we can change, such as the timezone for our application. In the config/app.php file, we can edit this and ensure that the timezone is set correctly.
You can check your timezone in the official timezone strings on the PHP Manual.
We can now cache our configurations using the command
php artisan config:cacheThe last thing in the Laravel setup is migrating the database.
php artisan migrate10. Install Let’s Encrypt SSL on Our Laravel Application
This is the last step in this tutorial. If you do not have a domain name yet, you can skip this part.
If you have a domain name assigned to the application, we can install a Free SSL certificate using Let’s Encrypt.
It is always recommended to secure your website with an SSL certificate.
We need to install the Certbot client on our server.
sudo apt-get install python3-certbot-apache -yAfter installing Certbot, we can install the Let’s Encrypt SSL Certificate on your Laravel website using the following command:
certbot --apache -d mydomain.comYou can change mydomain.com with your own domain name. Provide a valid email address and accept the terms of service.
Choose to redirect all the traffic to HTTPS.
At this point, your application is secured using Let’s Encrypt SSL. You can now access it securely through the URL https://mydomain.com.

What Next?
Now that your application is deployed to production, you can add more services such as Redis for caching, Load balancing to prevent single points of failure, and other relevant technology for your stack.
Conclusion
With this tutorial, you’ve learned how to deploy a Laravel Application on Apache and secure it with Let’s Encrypt SSL on Ubuntu. There are other ways of deploying a Laravel Application, such as deploying Laravel on Shared Hosting and deploying on Nginx and Ubuntu(LEMP), among others.
I hope this article was able to take you through the deployment steps. Thank you for reading.