Introduction
Social logins are becoming an integral part of most applications currently. Users prefer signing up to applications using their social credentials because it saves them time and is also convenient for them. Laravel Socialite package allows developers to add social logins to their applications with ease.
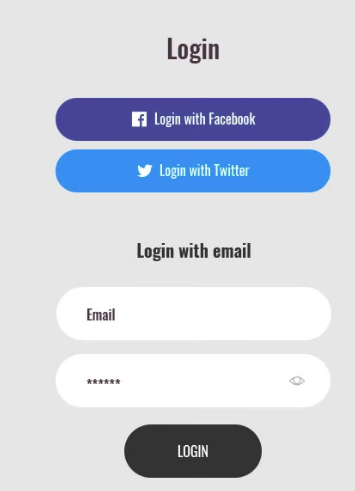
The figure above shows an example of a login page containing both form fields for login and social login buttons for both Facebook and Twitter. This has become a norm in most applications.
In this article, I am going to show you how to add social login implementation to your application.
What is Laravel Socialite
Laravel Socialite is a package developed to ease the implementation of social authentication by removing the complexities involved. With this package, a developer is able to add the social authentication aspect to their application with convenience, allowing them to be productive in the process.
Socialite currently supports authentication with Facebook, Twitter, Github, Google, LinkedIn, Bitbucket and Gitlab. Developers have created other community-driven providers. The community by the name of Socialite Providers have factored in most of the other Laravel Socialite Oauth providers that can be beneficial to have on your application. Some other Laravel socialite providers include Apple and Instagram, just to name a few.
How to use Laravel Socialite
Installation
To get started with Laravel Socialite authentication, use Composer package manager to add the dependency to your application.
composer require laravel/socialiteLaravel Socialite with Google
Once we install the Socialite package, we can use it to add Google authentication to our application. In this part, we are going to add Google authentication to our Laravel application.
To start off, we will first create a google client id and a secret id. To do so, we will access the Google Developers Console. We will then need to create our project and the credentials associated with our project.
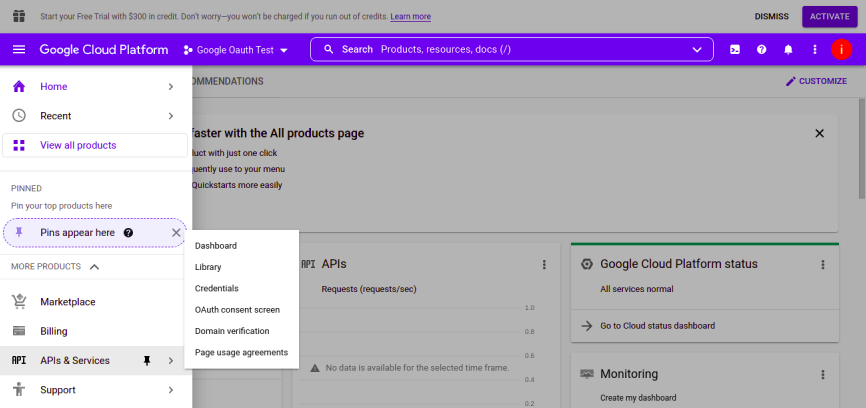
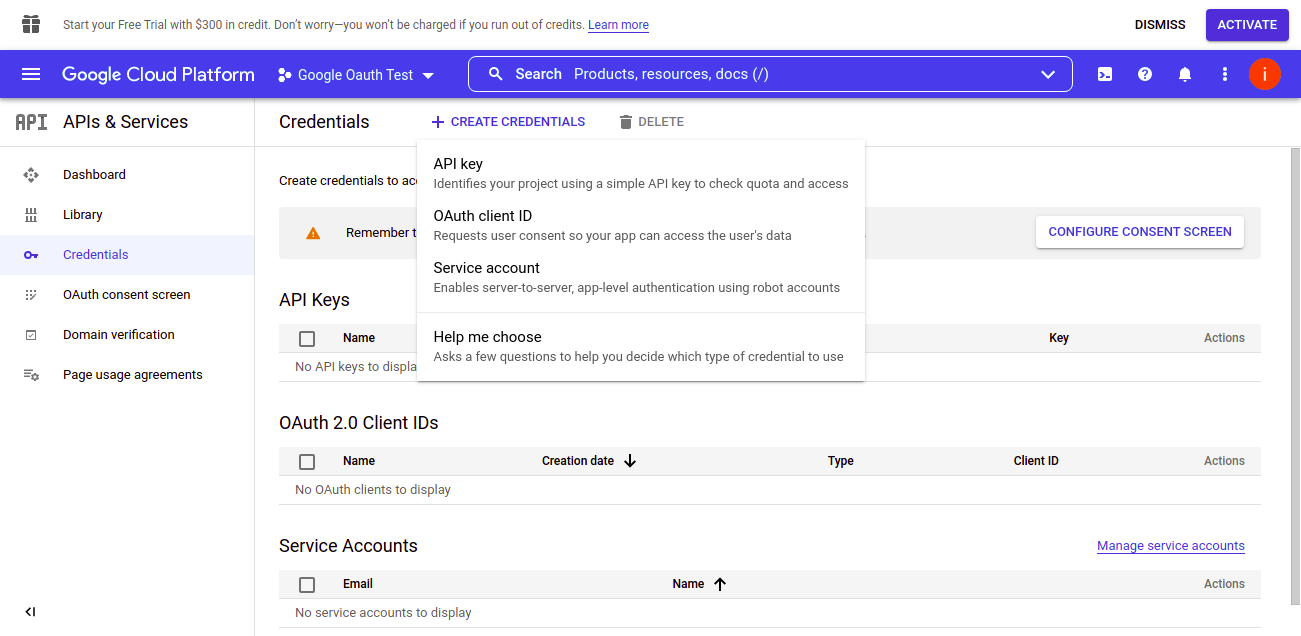
Now, just click on credentials and choose OAuth client ID.
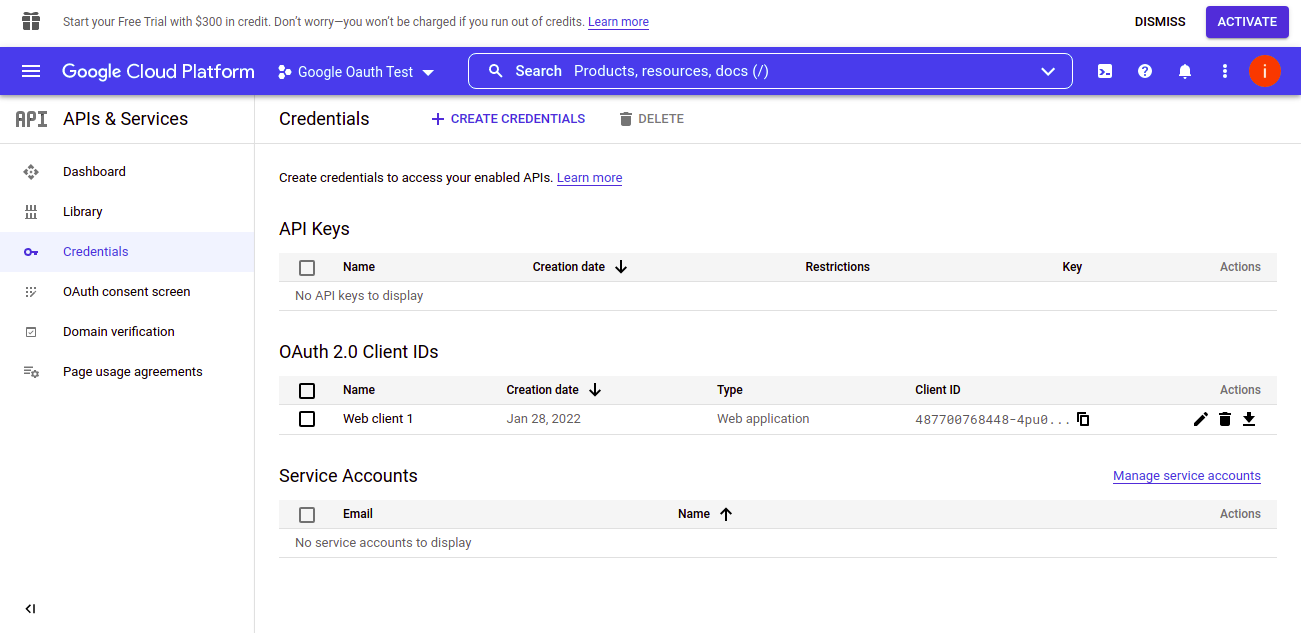
Once you have successfully created the credentials, you will get the client id and the secret id.
We also need to add the redirect URL that Google will use to redirect the user once they are authenticated.

Configuration
Once we have our credentials, we need to add them to our Laravel application. We will add the credentials to the config/services.php file. The configurations are as shown:
'google' => [
    'client_id'     => env('GOOGLE_CLIENT_ID'),
    'client_secret' => env('GOOGLE_CLIENT_SECRET'),
    'redirect'      => env('GOOGLE_REDIRECT_URL')
],
The actual credentials in the .env file are as follows:
GOOGLE_CLIENT_ID=000000000000-XXXXXXXXXXX.apps.googleusercontent.com
GOOGLE_CLIENT_SECRET=XXXXXXXXXXXXX
GOOGLE_REDIRECT_URL=http://localhost:8000/callback
Once the Configurations are set up, we need to add a basic Laravel authentication scaffold. This will create basic login and registration pages. We can any of the Laravel Starter Kits to create a scaffold of the authentication pages.
In this case, I will use the React with inertia starter kit for demonstration purposes.
I will create a basic authentication UI scaffold using the following commands:
composer require inertiajs/inertia-laravel
npm install @inertiajs/react
// resources/views/app.blade.php
<!DOCTYPE html>
<html>
<head>
<meta charset="utf-8" />
<meta name="viewport" content="width=device-width, initial-scale=1.0, maximum-scale=1.0" />
@vite('resources/js/app.js')
@inertiaHead
</head>
<body>
@inertia
</body>
</html>//resources/js/app.jsx
import { createInertiaApp } from '@inertiajs/react'
import { createRoot } from 'react-dom/client'
createInertiaApp({
resolve: name => {
const pages = import.meta.glob('./Pages/**/*.jsx', { eager: true })
return pages[`./Pages/${name}.jsx`]
},
setup({ el, App, props }) {
createRoot(el).render(<App {...props} />)
},
})We now need to update our user migration file to accommodate the credentials obtained from Google as shown.
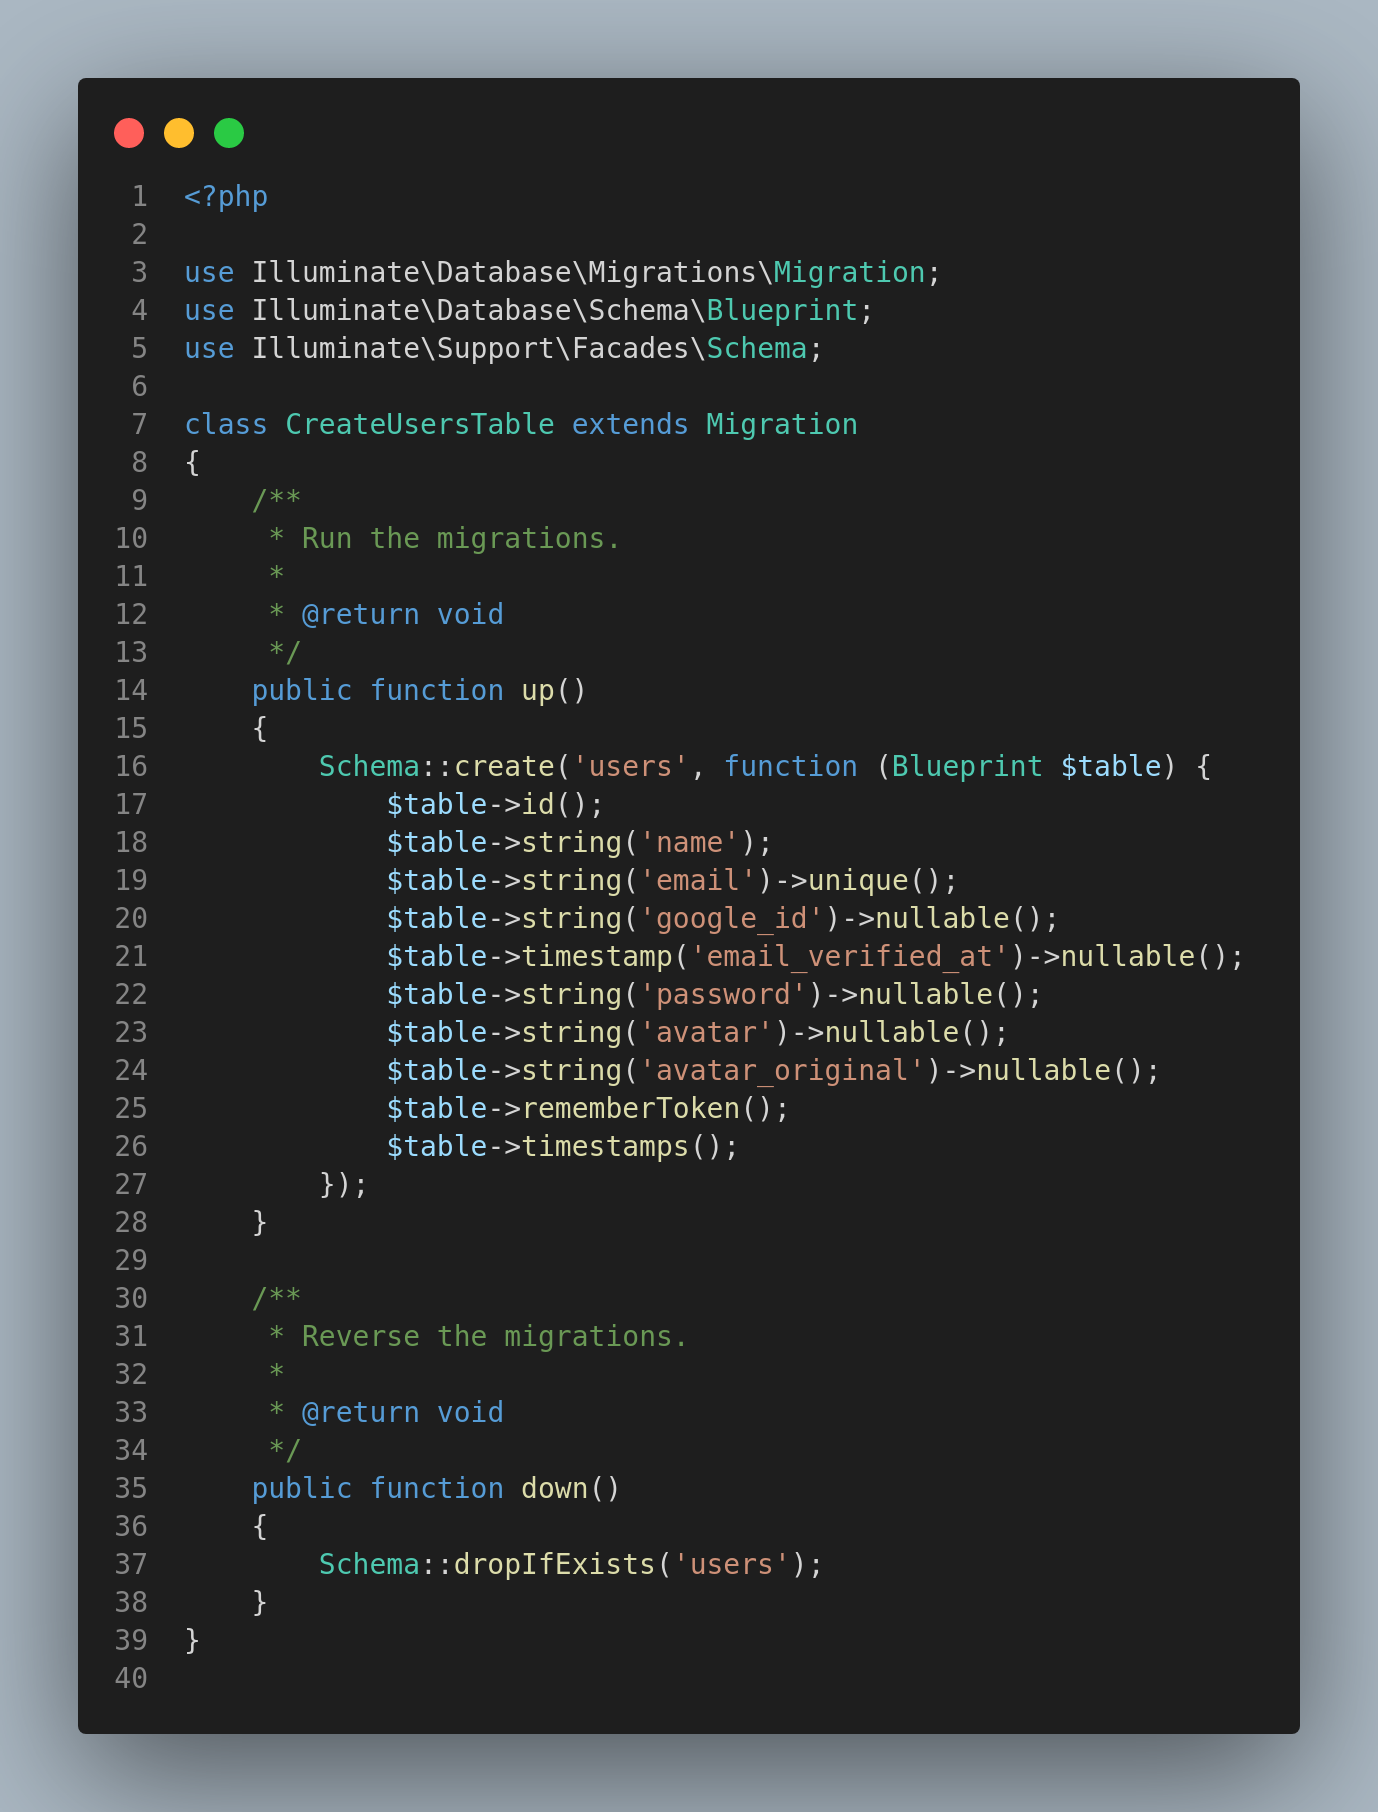
We then need to configure the routes in the routes/web.php file and add our endpoints for redirect and callback.
Route::get('/google-redirect', [LoginController::class, 'googleRedirect']);
Route::get('/callback', [LoginController::class, 'googleCallback']);
The first method will show the Google authentication page, while the second method will be responsible for handling the response once a user authenticates using Google as the provider.
To handle the redirect, we can add the following logic to the LoginController Class:
/**
  * Redirect the user to the Google authentication page.
  *
  * @return \Illuminate\Http\Response
  */
public function googleRedirect()
{
    return Socialite::driver('google')->redirect();
}
To handle the callback logic, we can add the following code to the LoginController class:
    /**
     * Obtain the user information from Google.
     *
     * @return \Illuminate\Http\Response
     */
    public function googleCallback()
    {
        try {
            $user = Socialite::driver('google')->user();
        } catch (Exception $e) {
            return redirect('/login');
        }

        // check if they're an existing user
        $existing = User::where('email', $user->email)->first();
        if ($existing) {
            // log the user in
            auth()->login($existing);
        } else {
            // create a new user
            $newUser                  = new User;
            $newUser->name            = $user->name;
            $newUser->email           = $user->email;
            $newUser->google_id       = $user->id;
            $newUser->avatar          = $user->avatar;
            $newUser->avatar_original = $user->avatar_original;
            $newUser->save();
            auth()->login($newUser);
        }
        return redirect()->to('/dashboard');
    }
The last step is to add a Google Button to our frontend login page and point to the relevant route(In this case the google-redirect route). With that, we have configured google authentication to our application.
Facebook Socialite Authentication
In this section, we are going to integrate Facebook authentication into our application using Laravel Socialite. To log in with Facebook, we need to create a Facebook app. To do so we need to have a Facebook Developers account. We then create a Facebook App.
Configuration
We need to add the configurations to our Laravel application. We will add the credentials to the config/services.php file. The configurations are as shown:
'facebook' => [
'client_id' => env('FACEBOOK_CLIENT_ID'),
'client_secret' => env('FACEBOOK_CLIENT_SECRET'),
'redirect' => env('FACEBOOK_REDIRECT_URL')
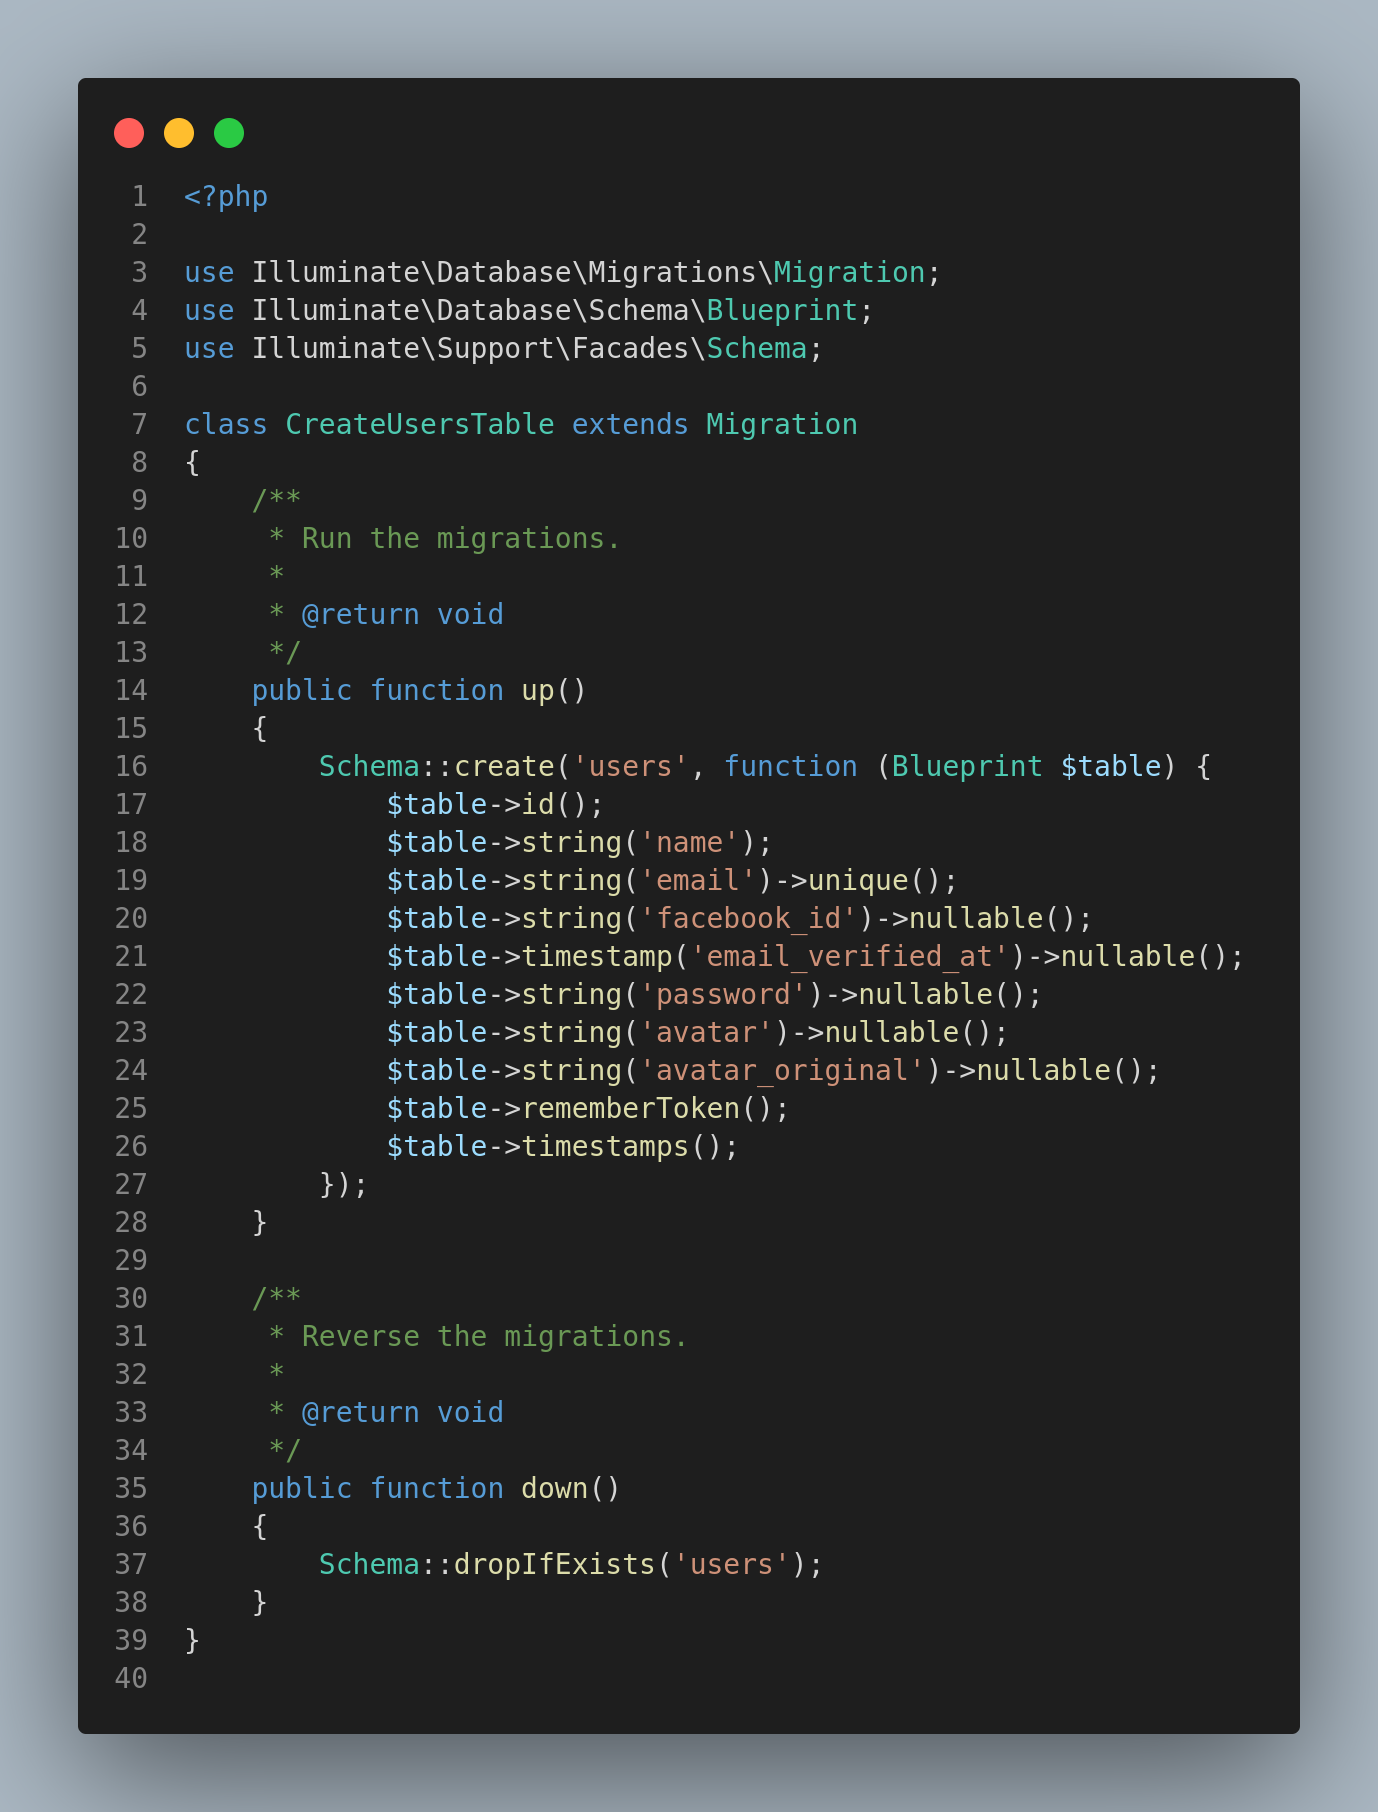
],We need to update our user_migration file to accommodate Facebook login credentials once a user chooses to use it.
We need to configure our routes in the routes/web.php file as follows:
Route::get('/facebook-redirect', [LoginController::class, 'facebookRedirect']);
Route::get('/facebook-callback', [LoginController::class, 'facebookCallback']);
The first method will show the Facebook authentication page while the second method will be responsible for handling the response once a user authenticates using Facebook as the provider.
To handle the redirect we can add the following logic to the LoginController Class:
/**
  * Redirect the user to the Facebook authentication page.
  *
  * @return \Illuminate\Http\Response
  */
public function facebookRedirect()
    {
        return Socialite::driver('facebook')->redirect();
    }
To handle the callback logic, we can add the following code to the LoginController class:
    /**
     * Obtain the user information from Facebook.
     *
     * @return \Illuminate\Http\Response
     */
    public function facebookCallback()
    {
        try {
            $user = Socialite::driver('facebook')->user();
        } catch (Exception $e) {
            return redirect('/login');
        }

        // check if they're an existing user
        $existing = User::where('email', $user->email)->first();
        if ($existing) {
            // log the user in
            auth()->login($existing);
        } else {
            // create a new user
            $newUser                  = new User;
            $newUser->name            = $user->name;
            $newUser->email           = $user->email;
            $newUser->facebook_id     = $user->id;
            $newUser->avatar          = $user->avatar;
            $newUser->avatar_original = $user->avatar_original;
            $newUser->save();
            auth()->login($newUser);
        }
        return redirect()->to('/dashboard');
    }
The last step is to add a Facebook Button to our login page and point to the relevant route(In this case the facebook-redirect route). We have successfully configured Facebook authentication to our application.
Socialite Twitter Authentication
We can also log in with Twitter in Laravel using Socialite. To do so, we need to create a Twitter application in the Twitter Developer Portal. This will provide us with the Twitter Client Id and App secret which we can use in our Laravel application.
Configuration
We need to add the configurations to our Laravel application. We will add the credentials to the config/services.php file. The configurations are as shown:
'twitter' => [
'client_id' => env('TWITTER_CLIENT_ID'),
'client_secret' => env('TWITTER_CLIENT_SECRET'),
'redirect' => env('TWITTER_REDIRECT_URL')
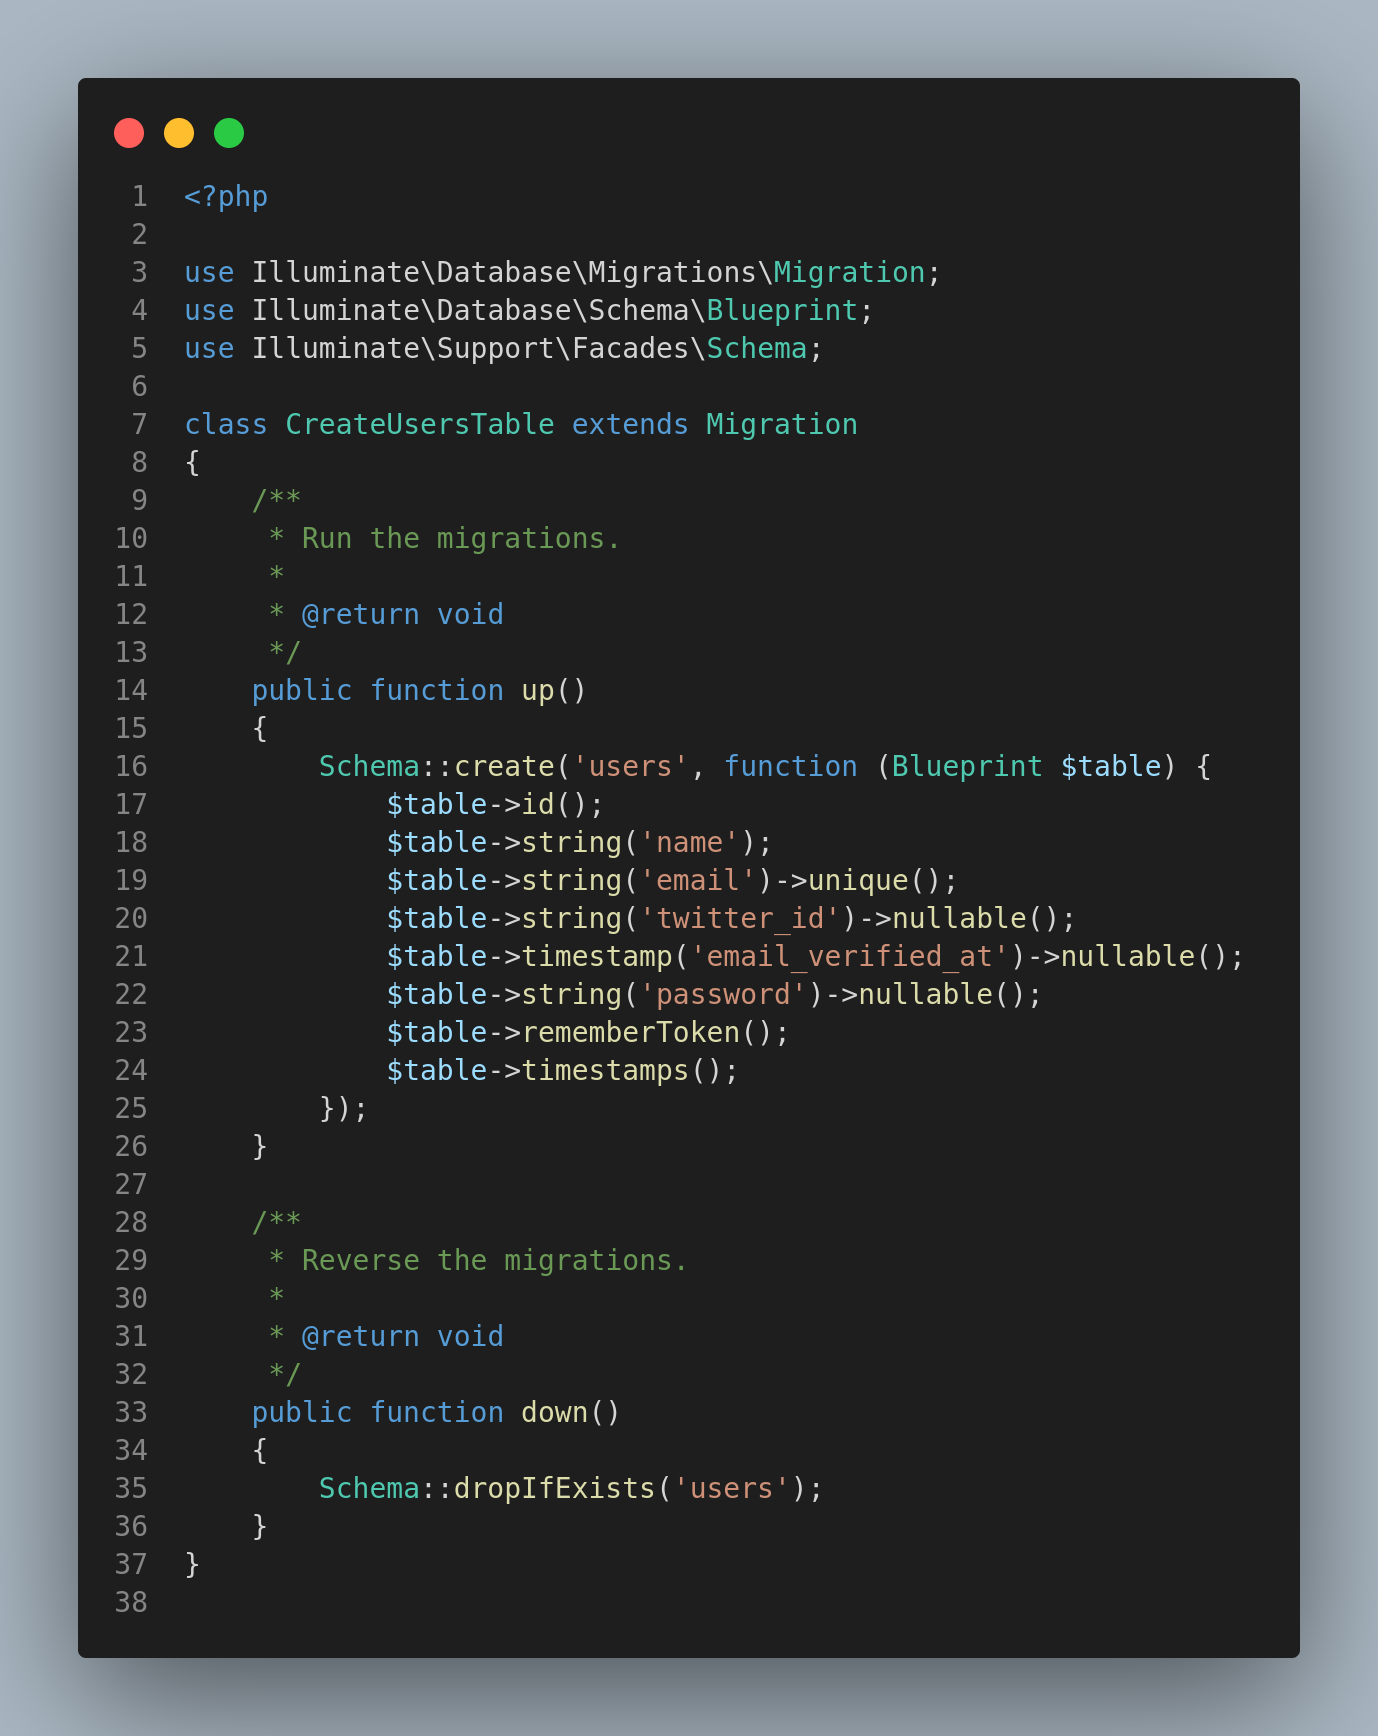
]After configurations, we are going to update the create a user migration file to accommodate Twitter as an authentication provider.
We will then need to update the routes/web.php file to factor in the Twitter redirect and callback routes.
Route::get('/twitter-redirect', [LoginController::class, 'twitterRedirect']);
Route::get('/twitter-callback', [LoginController::class, 'twitterCallback']);
The first method will show the Twitter authentication page, while the second method will be responsible for handling the response once a user authenticates using Twitter as the provider.
To handle the redirect we can add the following logic to the LoginController Class:
/**
  * Redirect the user to the Twitter authentication page.
  *
  * @return \Illuminate\Http\Response
  */
public function twitterRedirect()
{
   return Socialite::driver('twitter')->redirect();
}
The callback logic is handled as follows:
    /**
     * Obtain the user information from Twitter.
     *
     * @return \Illuminate\Http\Response
     */
    public function twitterCallback()
    {
        try {
            $user = Socialite::driver('twitter')->user();
        } catch (Exception $e) {
            return redirect('/login');
        }

        // check if they're an existing user
        $existing = User::where('email', $user->email)->first();
        if ($existing) {
            // log the user in
            auth()->login($existing);
        } else {
            // create a new user
            $newUser                 = new User;
            $newUser->name           = $user->name;
            $newUser->email          = $user->email;
            $newUser->twitter_id     = $user->id;
            $newUser->save();
            auth()->login($newUser);
        }
        return redirect()->to('/dashboard');
    }
The last step is to add a Twitter Button to our login page and point to the relevant route(In this case, the twitter-redirect route). We have successfully configured Facebook authentication to our application.
Conclusion
We have completed the Laravel Login with Google, Facebook and Twitter. Laravel Socialite allows us to add various social logins to our application, and this creates a good user experience for users. Users tend to prefer using social logins because they are easy to manage and secure.
There are so many implementations of Laravel Socialite, including Laravel Socialite with passport and Apple authentication, just to name a few. I hope this guide was able to shed some light on how to implement social authentication in your application. If you have any questions, feel free to ask them in the comment section, and I will try to answer all of them. Thanks for reading.