
You have worked hard to create your application, and now it’s time to deploy it so that others are able to see your application. But how? You may wonder. In this tutorial, I am going to show you how to deploy a Laravel app on an Ubuntu Server using the LEMP stack. There are other ways of deploying a Laravel application, such as deploying to Heroku and using Laravel Forge, among others.
In this particular tutorial, I am going to use a
For me, I prefer providers where I can comfortably know what my next bill will be rather than waking up to a huge bill that I had not anticipated.
What is LEMP?
LEMP is a tech stack comprised of the 4 major technologies needed by our Laravel application.
- Linux
- Enginx(Nginx)
- MySql
- Php
These 4 stacks will help us set up our server ready for our Laravel Application.
Why I Use LEMP over LAMP
I personally prefer using the LEMP Stack Over the LAMP stack because I find it easier to set up a server using Nginx as opposed to Apache. Nginx has a bunch of configurations that are not only easy to set up but also help optimize my application speed in the long run.
Prerequisites
The following are some of the requirements:
- An Ubuntu server. This can be obtained from any hosting provider, such as Digital Ocean, Linode, Vultr, and AWS.
- A Laravel Application
- A git repository
Deploy Laravel App on LEMP Stack
In order to deploy our application, we’ll need to go through a few steps. Let’s get this party started.
1. Log in via SSH
You can log in to an Ubuntu server in any of the cloud providers via SSH if you already have one.
SSH to your server can be done in a variety of methods, depending on your local operating system.
SSH Client on Windows
By default, Windows does not have an SSH client. As a result, you’ll need to download and install PUTTY, a Windows-based SSH client.
Linux and Mac
Both of these platforms have ssh clients inbuilt. You can use the ssh command in your terminal
Login to the server
We can log in to our server using aunty of the ssh clients. I am going to use the ssh command in my terminal.
ssh 100.100.100.101You can simply replace the 100.100.100.101 with your server IP address. Provide your username and password and you are successfully logged in to your server.
2. Update the package manager
Since we are using the apt-get package manager, we will need to ensure it is up to date before installing any packages.
sudo apt-get updateWe can proceed to the next step.
3. Install Nginx
Nginx is the E in the LEMP stack and it is the webserver that will be responsible for serving our Laravel application.
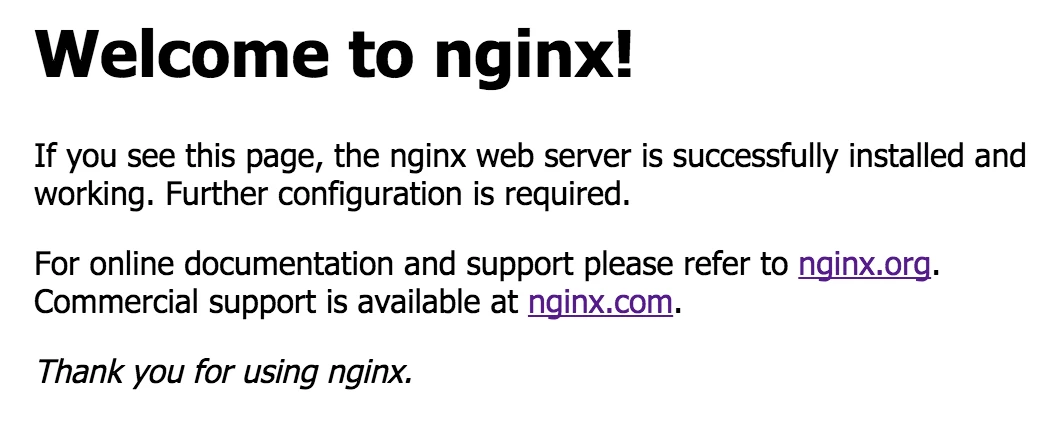
sudo apt-get install nginxOnce it’s done you can check your IP address on your browser by checking http://your-server-ip and you will be able to see the Nginx welcome page. For example, in my case, if I go to http://100.100.100.101, this is what I see.
4. Install MySQL
The next step is to install the MySQL server which will contain our database. This is the M in the LEMP stack You can install using the following command:
sudo apt-get install mysql-serverAllow the installation to proceed until you see a purple screen.
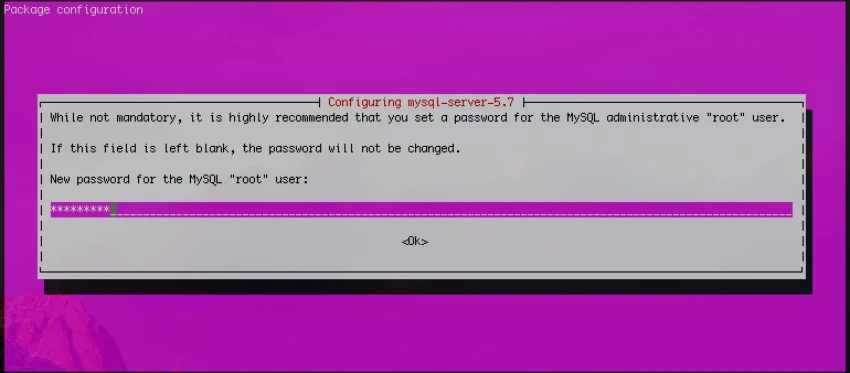
It will ask for a password. Choose something safe and secure. Ensure you remember this password as we will need it later.
Secure Mysql (Optional)
Mysql is well known to be insecure due to the fact that most people use the same configurations on production as the ones they use on their local development server. Heck, even I don’t have a password on my local MySQL server.
So, how do we secure our database server in production? Luckily for us, there is a command we can run to help us secure MySQL.
sudo mysql_secure_installationYou will be asked to install the VALIDATE PASSWORD plugin. I personally don’t install the plugin since I always want to have control over my passwords. In this part, I choose N
VALIDATE PASSWORD PLUGIN can be used to test passwords
and improve security. It checks the strength of password
and allows the users to set only those passwords which are
secure enough. Would you like to setup VALIDATE PASSWORD plugin?

Press y|Y for Yes, any other key for No:
The next question asked is if I want to change the existing password for root. I personally don’t change it because I ensure the password I enter is secure. So I choose N
The next question is about removing anonymous users. I recommend you remove them because this is a major security risk. So choose Y.
Next, it will ask you to disallow root login remotely. I normally choose Y because I don’t want anyone accessing my database remotely.
You may get another prompt asking to remove the test database. Choose Y in this step. You may also be asked to reload the privileges table. Also, choose Y. With that, you are done with the installation of MySQL.
5. Install PHP
This is the last tech stack in the LEMP stack. It represents the P in the stack. We will need to install PHP for processing; the php-fpm plugin which stands for “FastCGI Process Manager”. We also need to install php-mysql which will allow us to query MySQL using Eloquent and also php-mbstring which is a requirement for Laravel.
sudo add-apt-repository -y ppa:ondrej/php
sudo apt-get update
sudo apt-get install php-fpm php-mysql php-mbstring unzip php-json php-bcmath php-zip php-gd php-tokenizer php-xml
At the time of writing, this command will install PHP version 8.4 onto my Digital Ocean droplet.
If for some reason you get the error apt add repository command not found, you can run this command.
sudo apt-get install software-properties-commonOnce this runs, you can try and install PHP again.
With that, we have installed the full LEMP stack and we are now ready to start configuring our server to host our Laravel application.
6. Install Composer
Composer is a PHP dependency manager that keeps track of the libraries and dependencies that PHP applications need. We’ll need it to install the Laravel packages and dependencies.
Run the following command to install Composer:
curl -sS https://getcomposer.org/installer | php You should see the following output:
All settings correct for using Composer
Downloading...

Composer (version 2.8.8) successfully installed to: /root/composer.phar
Use it: php composer.phar
Move the downloaded binary to the system directory using this command:
sudo mv composer.phar /usr/local/bin/composerWe can verify the version by typing the command:
composer --versionAt the time of writing, this is the output I got:
Composer version 2.8.8 2025-04-04 16:56:46
PHP version 8.4.6 (/usr/bin/php8.4)
7. Configure PHP
Now that PHP is already installed, we can now start configuring it. We can open the php.ini file and make a small tweak to it. I personally use Nano text editor but you are free to use any of the editors such as vim.
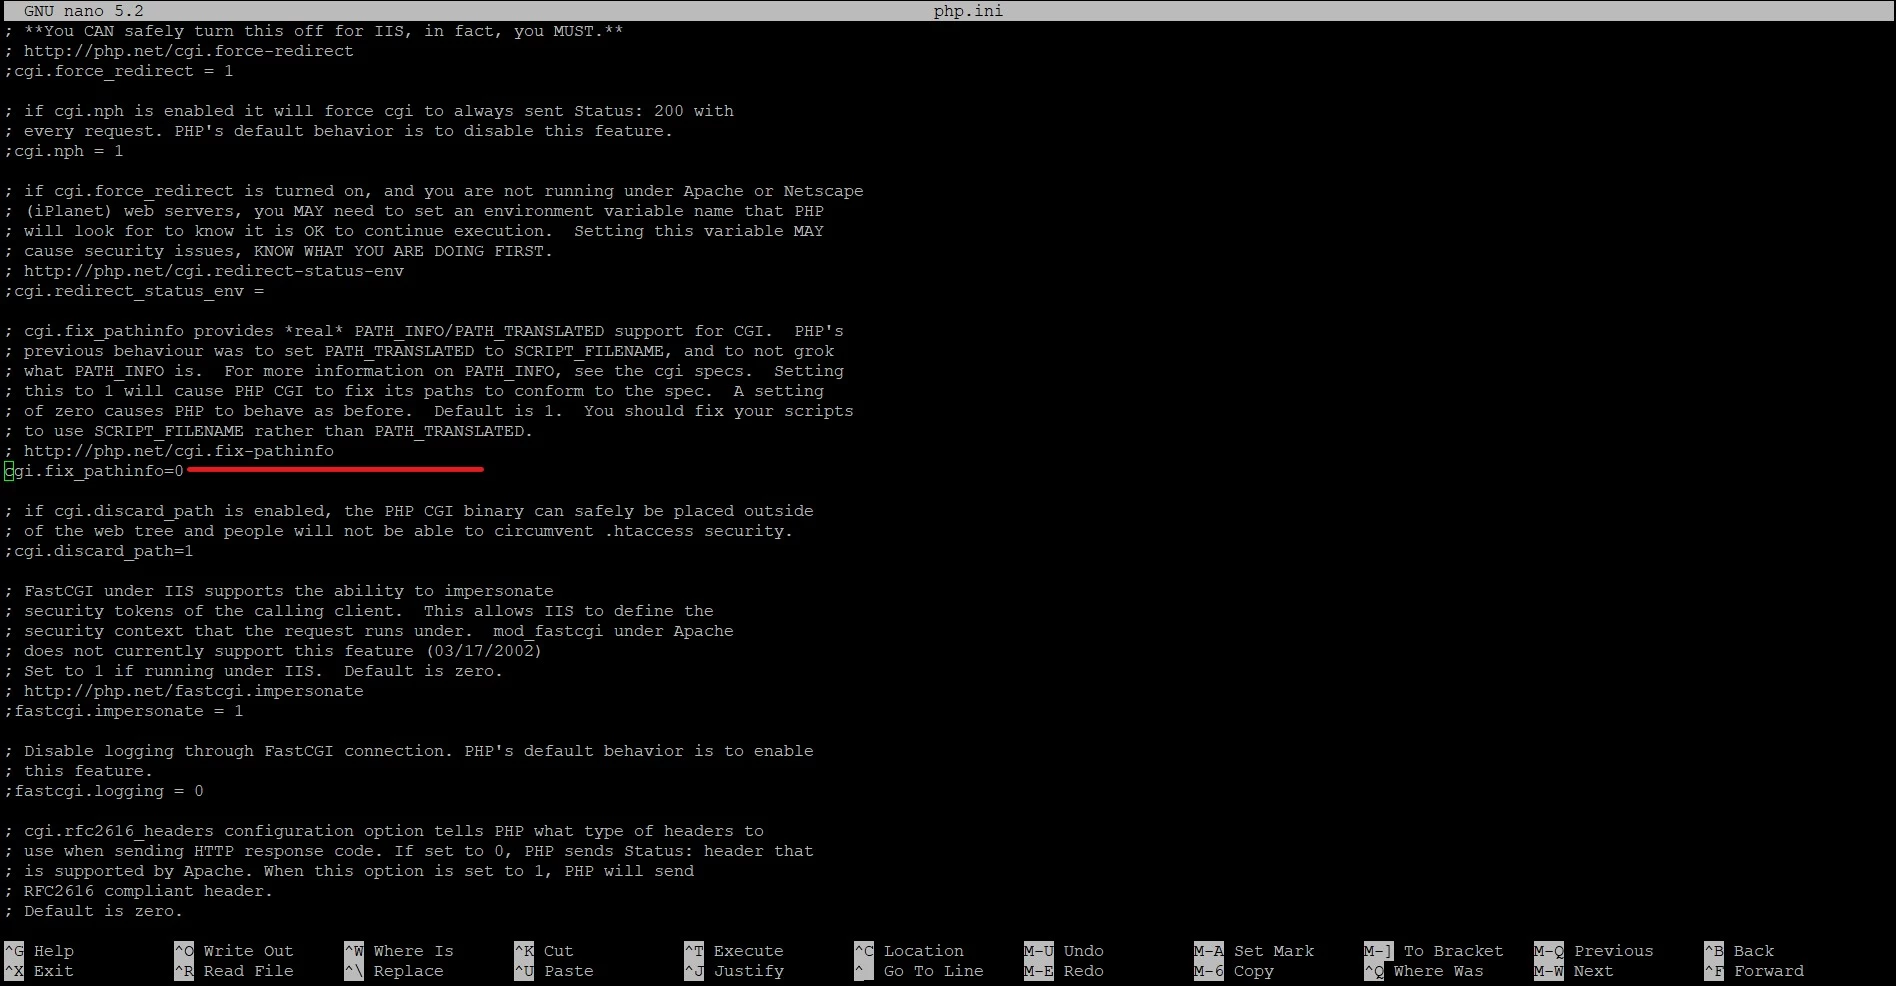
sudo nano /etc/php/8.4/fpm/php.iniEnsure you replace 8.4 with the correct version of PHP installed on your server.
The next step is to find the cgi.fix_pathinfo configuration in the php.ini file. You can use the search functionality in nano by pressing ctrl+w and inserting cgi.fix_pathinfo= on the search field and pressing enter. This will take you directly to the line. We want to uncomment the configuration by deleting the semicolon and then changing it from 1 to 0. Once done, save the changes by pressing ctrl+s or ctrl+x.
The last step is restarting php-fpm for the changes to take effect.
sudo systemctl restart php8.4-fpm8. Configure Nginx
Here is where things will get spicy. We need to configure Nginx to enable it to serve our laravel application.
Add index.php file recognition
We will first start by adding the configurations in the configuration file. We can open it using the command:
sudo nano /etc/nginx/sites-available/defaultThe first step is to instruct Nginx to recognize index.php files.
server {
    listen 80 default_server;
    listen [::]:80 default_server;

    root /var/www/html;
    index index.php index.html index.htm index.nginx-debian.html;

    server_name _;

    location / {
        try_files $uri $uri/ =404;
    }
}
We will add the index.php file to the Index part.
Specify Server Name
The next step is adding our IP address to the server_name line. This instructs Nginx concerning which application it should serve when a certain domain name is visited on the browser. It is at this point that we can add a domain name if we had one. Since I have none at the moment, I will just use my server ip address.
server {
    listen 80 default_server;
    listen [::]:80 default_server;

    root /var/www/html;
    index index.php index.html index.htm index.nginx-debian.html;

    server_name 100.100.100.101;

    location / {
        try_files $uri $uri/ =404;
    }
}
Update Location Block
The next step is to instruct Nginx to use php-fpm which we had installed earlier. This will help in making our application faster and have better performance. We also need to instruct Nginx to ignore all .htaccess files. This is because .htaccess files are used by Apache and we don’t want to use Apache in our case.
By default, laravel comes with a .htaccess file which can be found in the public folder. We want to ignore it and have Nginx serve our application by default.
This is how our new Nginx config file should look:
server {
    listen 80 default_server;
    listen [::]:80 default_server;

    root /var/www/html;
    index index.php index.html index.htm index.nginx-debian.html;

    server_name 100.100.100.101;

    location / {
        try_files $uri $uri/ =404;
    }

    location ~ \.php$ {
        include snippets/fastcgi-php.conf;
        fastcgi_pass unix:/run/php/php8.4-fpm.sock;
    }

    location / {
        try_files $uri $uri/ /index.php?$query_string;
    }

    location ~ /\.ht {
        deny all;
    }
}
As you can see in the first location block we are instructing Nginx to use php-fpm to process our PHP logic in our Laravel application. The second block instructs Nginx to pass all the query strings to the index.php file which will then handle the query data. It attempts to serve a request as a file, then as a directory, then falls back to displaying a 404.
In the third location block, we are instructing Nginx to ignore all files that have a .ht prefix which in our case is the .htaccess files.
Specify Root Folder
The next step is specifying the default folder where our laravel application will be located. This can be set in the root line which specifies where the index.php file can be found. Laravel has the index.php file in the public folder and as a result, we need to tell Nginx where to find the file.
We can update the config file as shown:
server {
    listen 80 default_server;
    listen [::]:80 default_server;

    root /var/www/laravel/public;
    index index.php index.html index.htm index.nginx-debian.html;

    server_name 100.100.100.101;

    location / {
        try_files $uri $uri/ /index.php?$query_string;
    }

    location ~ \.php$ {
        include snippets/fastcgi-php.conf;
        fastcgi_pass unix:/run/php/php8.4-fpm.sock;
    }

    location ~ /\.ht {
        deny all;
    }
}
With that, we can save the file for now by pressing ctrl+x and then typing Y or simply pressing ctrl+s.
We can ensure that the file is ok and has no syntax errors by typing this command in our terminal
sudo nginx -tThis should output the following:
nginx: the configuration file /etc/nginx/nginx.conf syntax is ok
nginx: configuration file /etc/nginx/nginx.conf test is successful
Restart Nginx
The last step is restarting Nginx so that our changes can take effect.
sudo systemctl reload nginx9. Configure MySQL
The next step is to set up a database. Earlier we installed a MySQL database server but we now need to create a database that will be used by our Laravel application. To do so we will first login to our database server using the MySQL command:
mysql -u root -p 'yourpassword'The flag -u just specifies the username and -p specifies the password. Make sure you use the password you entered earlier.
Once you are logged in you will see the following:
mysql>
This indicates that you are now in the MySQL CLI. We can now create a database
CREATE DATABASE yourdatabase;Once the database has been created, we can assign privileges to a user that will be responsible for interacting with the database.
GRANT ALL PRIVILEGES ON database_name.* TO 'username'@'localhost';We can now flush the privileges for the changes to take effect
FLUSH PRIVILEGES;To verify that it has been created, you can use the command show databases to check the existing databases.
SHOW DATABASES;Once we have confirmed, we can now exit the database server by typing exit. And that is pretty much it on the database part.
10. Install Laravel
This is the last step in this tutorial. Now that our server is ready to handle a laravel application, we can now push our laravel application to the server.
We will first create the directory that will host our Laravel application. We had also specified it in the Nginx configuration file
sudo mkdir /var/www/laravel && cd /var/www/laravelOnce we are in this directory, we can clone our application onto the server using git. Here, you can set up GitHub Actions to Push your application to the server through Git hooks. You can read this article on how to automate deployment using GitHub Actions
For now, I will just clone a new Laravel app
git clone https://github.com/laravel/laravel.gitRun Composer
Once our application has been cloned successfully onto the server, we can now install the composer dependencies.
composer install --no-devWe use the no-dev flag to install only the dependencies that are required in production.
Laravel Permissions
We first need to change the ownership of the Laravel folder to the web group
sudo chown -R www-data:www-data /var/www/laravelBecause this is a new folder we have created, we need to assign permissions to allow it to have read-write permissions to the storage folder. This folder contains the log file which will house all the logs for our application and can help us debug our application when it fails.
We also need this folder to have read-write permissions because if our applications have files and folders being uploaded, they will be stored in this folder.
sudo chmod -R 775 /var/www/laravel/storageWith that, the permissions are done.
Configuring Laravel
The next step is to generate a .env file which we can do with the copy command
cp .env.example .envWe also need to generate the encryption key for our application
php artisan key:generateLet’s add our environment variables such as database credentials, mail configurations and any other app secret that need to be stored in the .env file.
sudo nano .envWe can also set the APP_ENV Key to production since our application is in production and also turn the APP_DEBUG key to false. This ensures that no debug and stack trace messages are displayed to the general public.
APP_ENV=production
APP_DEBUG=false
APP_KEY=base64:kGKg6DnMqMGBJrLGDh4Jg+bTIXqcVXZKqJdqueTlkCk=
APP_URL=http://mydomain.com

DB_HOST=localhost
DB_DATABASE=yourdatabasename
DB_USERNAME=root
DB_PASSWORD=yourdatabasepassword

CACHE_DRIVER=file
SESSION_DRIVER=file
QUEUE_DRIVER=sync

REDIS_HOST=localhost
REDIS_PASSWORD=null
REDIS_PORT=6379

MAIL_DRIVER=smtp
MAIL_HOST=googlemail.com
MAIL_PORT=465
MAIL_USERNAME=XXXXXXXXXXX
MAIL_PASSWORD=XXXXXXXXXXX
MAIL_ENCRYPTION=null
There are a few more things we can change such as the timezone for our application. In the config/app.php file, we can edit this and ensure that the timezone is set correctly. You can check your timezone in the official timezone strings on the PHP Manual.
If your application is storing files on the server, you can also create a symlink to the public folder in order to display the files
php artisan storage:linkThe last thing is to cache necessary configurations and routes to make our application even faster.
php artisan optimizeLet’s not forget to migrate our database
php artisan migrate --forceWe are now done. You can now access and view your application on your browser by heading over to http://your-server-ip Your application is now ready and fully deployed to production.

11. Add an SSL Certificate for HTTPS
This is the last step in this tutorial If you do not have a domain name yet, you can skip this part.
If you have a domain name assigned to the application, we can install a Free SSL certificate using Let’s Encrypt. It is always recommended to secure your website with an SSL certificate.
We need to install the Certbot client on our server.
sudo apt install certbot python3-certbot-nginx -yOnce Certbot is installed, you can now request an SSL certificate for your domain name
sudo certbot --nginx -d example.comThis will generate an SSL certificate for you and certbot will rewrite your Nginx configuration file to handle redirects from HTTP to HTTPS and also set the path to the SSL certificates.
By default Let’s Encrypt certificates expire after 90 days and we might want to renew them as soon as they expire.
To do so we can set a cron job to renew the certificates once they expire.
Conclusion
In this tutorial, we have deployed a Laravel app on a LEMP stack using Ubuntu and Nginx. There are other ways of deploying a Laravel application such as deploying a Laravel application on the LAMP Stack and deploying on Heroku among others. I hope this article was helpful in helping you deploy your application on the LEMP stack. If you have any questions, feel free to ask them in the comment section below.